A full bathroom renovation in Ireland follows a clear sequence: planning and design, materials selection, strip-out, first fix plumbing and electrical, waterproofing, tiling, second fix, sanitaryware installation, and final snagging. From the first conversation to handover, the on-site work typically takes 7 to 10 working days for a standard bathroom in an Irish home. The planning stage before work begins, which is where most delays actually happen, adds another two to four weeks depending on how quickly decisions are made and materials arrive.
Quick Glance: How Long Does it Take?
| Stage | Typical Duration |
|---|---|
| Planning, design, and contractor selection | 2 to 4 weeks |
| Ordering sanitaryware and tiles | Allow 2 to 4 weeks for delivery |
| Strip-out and demolition | Day 1 |
| First fix plumbing and electrical | Day 2 |
| Wall prep and waterproofing | Day 3 |
| Tiling (walls and floor) | Days 4 and 5 |
| Second fix plumbing and electrical | Day 6 |
| Shower screen, furniture, accessories | Day 7 |
| Painting and finishing | Day 8 |
| Snagging and handover | Days 9 and 10 |
Before Work Starts: Planning and Design
The on-site work is the visible part of a bathroom renovation. The planning stage is where the project either sets itself up for success or guarantees problems later.
Set Your Budget and Understand the Costs
A standard bathroom renovation in Ireland costs between €6,500 and €12,000 depending on size, finish, and the extent of plumbing work involved. In Dublin, labour costs run 10 to 15% above the national average due to demand and urban logistics (LN Bathroom Renovations Dublin, 2026). A small ensuite starts from around €5,500 in Dublin. A full bathroom with mid-range finishes typically falls between €8,000 and €11,000. Wet rooms and high-end builds push to €15,000 and beyond.
Set aside a contingency of 15% before work starts. In older Dublin homes, particularly pre-1970s terraces and semis, opening up walls and floors regularly reveals damp, outdated pipework, or structural surprises that were invisible beforehand.
Decide on the Layout Before Anything Else
The single most expensive decision in a bathroom renovation is whether to move the plumbing. Keeping the toilet, shower, and basin in their existing positions is the most cost-effective approach. Moving even one outlet adds €500 to €1,500 in pipework and labour. Moving the soil stack in an older property can cost considerably more. If the current layout works, spend the money on better finishes rather than repositioning.
If the layout genuinely needs to change, this is the point to confirm it, not after the tiler has arrived on site.
Choose Your Sanitaryware and Tiles Before the Start Date
This is the stage most homeowners underestimate and the most common cause of project delays. Your plumber and tiler need to know the exact dimensions of every fitting before they start. The toilet projection determines where the soil pipe connects. The shower tray size determines how the floor is tiled. The basin depth determines whether the existing waste can be reused. If these are not confirmed before day one, the project stalls.
Order your sanitaryware and tiles at least three to four weeks before the planned start date. Bespoke shower glass and imported tiles in particular can take three to four weeks to arrive. A tiler who turns up to find tiles are not on site either leaves and goes to another job or waits on your time and budget. Neither is good.
Get Written Quotes from Three Contractors
Get at least three quotes from contractors who have physically visited the bathroom. A quote provided over the phone or based on photos is an estimate, not a fixed price. Each written quote should clearly itemise labour, waste removal, materials being supplied by the contractor, and what is excluded. The industry standard payment structure is a deposit to secure the booking, a mid-project payment, and the balance on completion. Never pay the full amount upfront.
Check that your plumber is RGI-registered and your electrician is RECI-registered. Both are legal requirements for their respective trades in Ireland.
Stage 1: Strip-Out and Demolition (Day 1)
The renovation begins with clearing the existing bathroom back to bare walls and floor. Old sanitaryware, tiles, flooring, boxing, and any plasterboard or adhesive on walls are removed. This is the messiest day of the project and also the most revealing.
Once walls and floors are exposed, your contractor can assess what is actually there. Damp behind tiles, rotten floor joists, corroded pipework, and outdated wiring are all common finds in older Irish homes, particularly those built before 1980. Anything found at this stage needs to be addressed before the build continues. This is where the contingency budget earns its place.
Waste is removed and skipped. In Dublin, skip hire typically costs €250 to €400 for a standard bathroom clearance, and a skip permit from the local authority is required for any skip placed on a public road.
Stage 2: First Fix Plumbing and Electrical (Day 2)
With the room stripped back, the plumber and electrician complete all their hidden work before any walls are boarded or plastered. First fix covers everything that will be concealed inside walls and under floors.
First Fix Plumbing
This includes running new pipework for water supply and waste, relocating pipe positions if the layout is changing, installing new soil pipe connections, and fitting any underfloor heating manifolds. In older Dublin properties, the existing copper pipework is often in poor condition and this is the right time to replace it rather than connecting new fittings to old pipe.
First Fix Electrical
The electrician runs all new cabling for lighting, extraction, shaver sockets, and heated towel rails. Irish bathrooms are divided into electrical zones (Zone 0, 1, and 2) under the building regulations, which determine what fittings and cable types can be installed where. All electrical work must comply with these zone requirements and must be signed off by an RECI-registered electrician.
If underfloor heating is part of the project, the heating mat or pipe is laid at this stage before screeding or boarding begins.
The critical rule for first fix: do not close walls until both the plumber and electrician have signed off that their work is complete. This is the most commonly violated sequencing rule in bathroom renovations and the most expensive to fix later.
Stage 3: Wall Preparation and Waterproofing (Day 3)
Once first fix is complete, the walls and floor are prepared for tiling. Cement board or moisture-resistant plasterboard is fixed to walls in wet areas, providing a stable and water-resistant substrate for tiles. Any uneven surfaces are levelled.
Tanking: The Step You Cannot Skip
Tanking, or waterproofing, is the application of a waterproof membrane to all surfaces in the shower enclosure and wet areas before a single tile goes on. It is painted or rolled onto the substrate in multiple coats and allowed to cure.
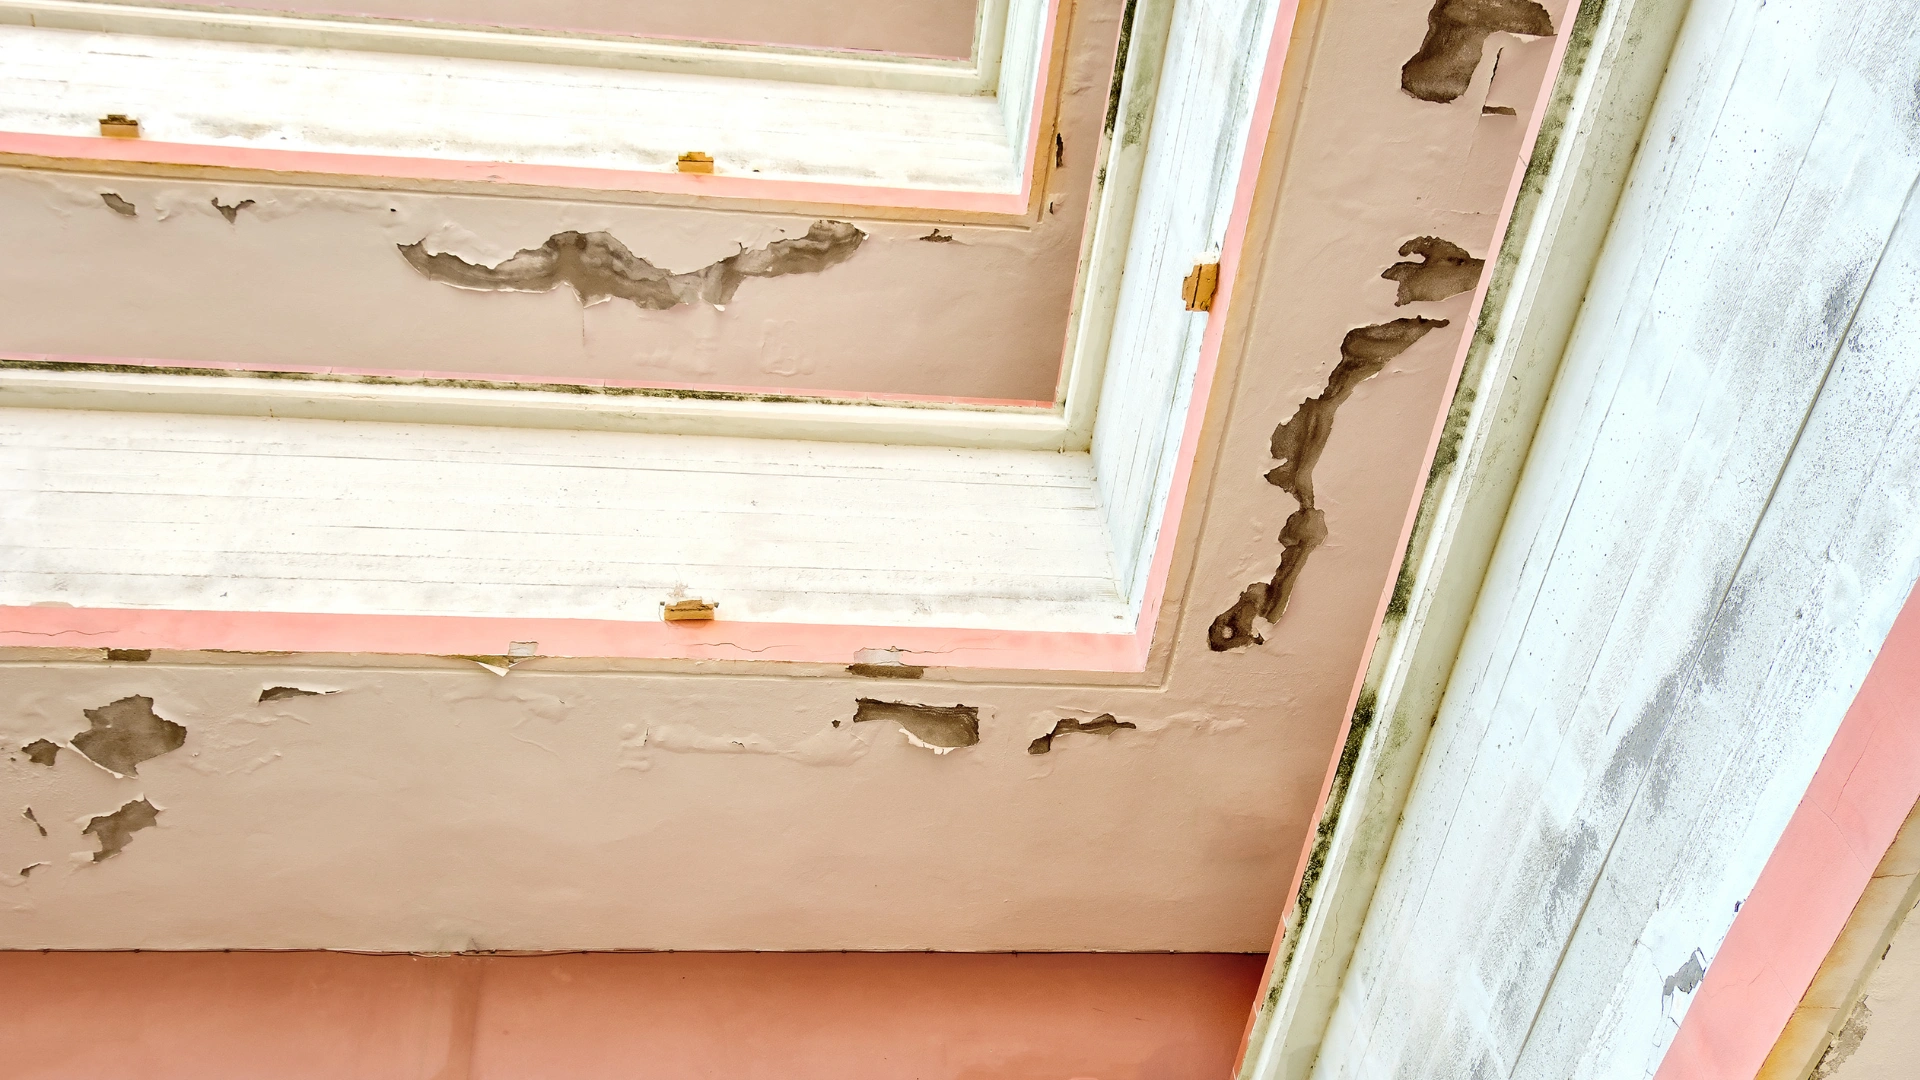
This is the most commonly skipped stage in lower-quality bathroom renovations, and it is the primary cause of damp ingress, mould, and structural damage in bathrooms across Ireland. A failed waterproof seal behind tiles means ripping everything out and starting again. Done properly, it adds one day and a relatively modest cost. Skipped, it creates problems that show up two to five years later and cost far more to fix than doing it right the first time.
The tanking must cure overnight before tiling begins. Do not rush this stage.
Stage 4: Tiling (Days 4 and 5)
With waterproofing cured, the tiler starts on walls. The shower area is always tiled first, working outward. Large format tiles go up before any cut tiles around windows, niches, or corners. Once wall tiling is complete, floor tiling begins.
Layout Decisions That Must Be Made Before Tiling Starts
Grout colour, tile layout pattern, and the position of any recessed niches in shower walls must be confirmed before the tiler starts. Changing these decisions after tiling has begun means cutting out finished work and re-tiling, which is expensive and delays the project by at least a day.
If you have a niche planned in the shower wall for shampoo storage, confirm its position and size with the tiler on day four before anything goes up around it. This is a decision that affects the tiler’s whole plan for that wall.
Grouting follows tiling, typically on day five. Allow 24 hours for grout to cure before the shower enclosure is used.
The Tile Calculation Rule
When ordering tiles, always add 10% to your calculated coverage for waste, cuts, and breakages. For complex patterns, diagonal layouts, or small mosaic tiles, add 15%. Running short of tiles mid-project is a costly problem if the batch number has changed since you ordered, as tile shading varies between production batches.
Stage 5: Second Fix Plumbing and Electrical (Day 6)
With tiling complete, trades return to connect and fit all the visible elements.
Second Fix Plumbing
The plumber connects and installs the toilet, basin, bath or shower tray, shower valve, taps, waste fittings, and any heated towel rail plumbing connections. This is the day the bathroom starts to look like a bathroom.
Second Fix Electrical
The electrician fits all visible electrical elements: light fittings, extraction fan units, shaver sockets, and any underfloor heating thermostat controls. The extraction fan is connected and tested. Irish building regulations require adequate mechanical ventilation in bathrooms, meaning the fan must be appropriately sized for the room volume, not just the cheapest unit available.
Stage 6: Shower Screen, Doors, and Furniture (Day 7)
Shower screens and enclosures are fitted once tiling and second fix are complete. This is why the shower glass must be ordered with accurate measurements before the project starts. Bespoke shower glass cut to a specific dimension from a supplier can take three to four weeks to arrive, and nothing else in the bathroom can be fully completed until it is fitted.
Vanity units, mirror cabinets, and any built-in furniture are installed at this stage. Shelving, towel bars, toilet roll holders, and accessories go on last, once all painting is complete.
Stage 7: Painting and Finishing (Day 8)
Any non-tiled walls and the ceiling are painted at this stage. Ceilings in Irish bathrooms should always be finished with a specialist bathroom or kitchen paint with mould-resistant properties. Ireland’s damp climate combined with steam from showers creates ideal conditions for ceiling mould when standard emulsion is used.
Skirting boards and architraves are fitted and painted. Silicone sealant is applied to all junctions between the sanitaryware and tiles, particularly around the bath, shower tray, and basin. The silicone must be given 24 hours to fully cure before the shower or bath is used.
Stage 8: Snagging and Handover (Day 9 to 10)
Before you accept the completed bathroom, walk through it with your contractor and check everything systematically.
Run the shower and check there are no leaks at the tray or screen. Fill the basin and watch the waste drain. Flush the toilet and check the cistern refills correctly. Turn on the extraction fan and confirm it is drawing air. Check every tile for any that are hollow (tap gently and listen for a different sound, which indicates poor adhesion behind). Check grout lines are consistent and fully filled. Check all silicone joints for gaps.
Note anything that needs attention on a written snag list and agree a date for the contractor to return and complete it before you make the final payment. The final payment is your leverage. Use it.